
Introduction
Did you know that 73 percent of home cooks say prime rib is the most impressive dish they can serve to guests? Yet most people avoid making it because they think it requires professional skills. The truth is simpler than you might expect.
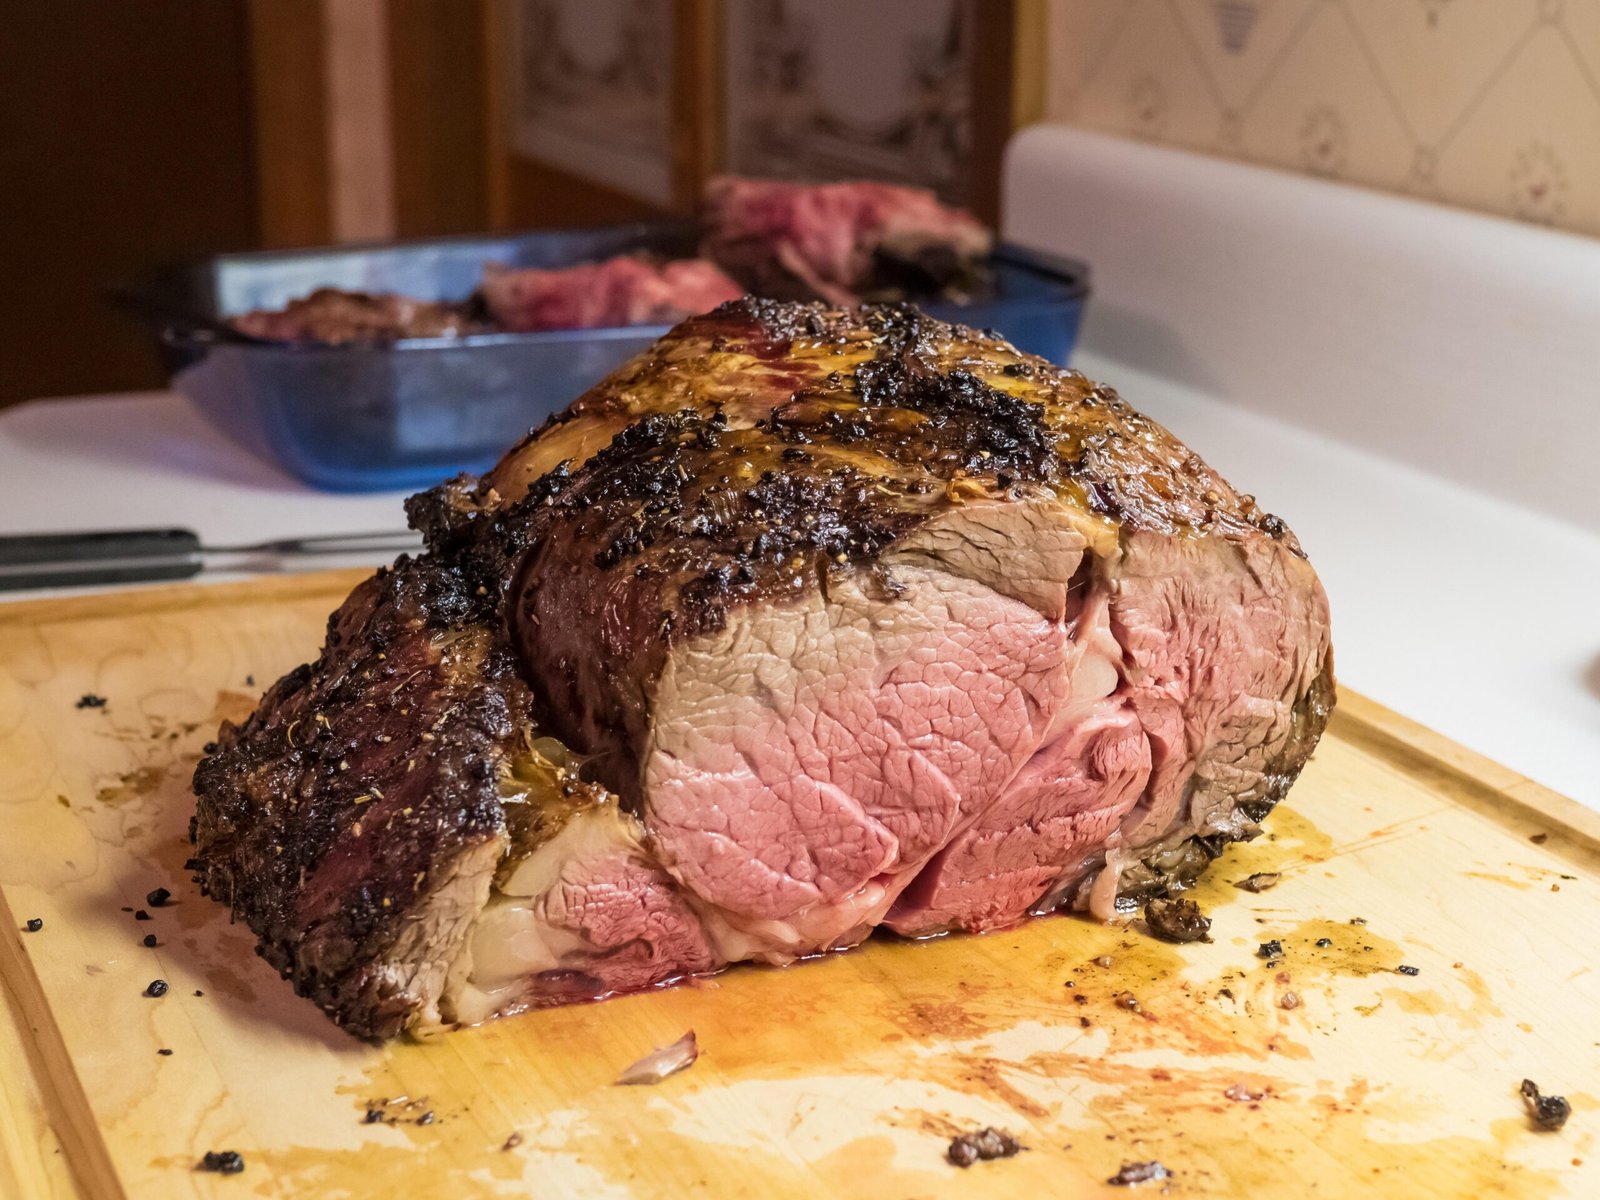
Cooking prime standing rib roast green egg style gives you results that rival any steakhouse. The ceramic walls of the Green Egg create even heat that wraps around your meat. This method produces a perfect crust while keeping the inside tender and juicy.
This guide walks you through every single step. You will learn how to pick the right cut. You will master temperature control. You will gain confidence to serve this impressive dish anytime.
Many grill owners buy expensive equipment but never unlock its full potential. Your Green Egg can do more than burgers and chicken. It excels at low and slow cooking that transforms tough cuts into tender meals.
Let us start with why this cooking method works so well for rib roast.
Why Green Egg Works Best for Rib Roast
The Green Egg creates a unique cooking environment. Thick ceramic walls hold heat steady for hours. This stability matters most when cooking large cuts of meat like standing rib roast.
Regular grills lose heat when you open the lid. The Green Egg bounces back fast. Your cooking temperature stays within ten degrees of your target. This precision prevents overcooking.
Moisture stays inside the cooking chamber. The sealed design traps steam from the meat. This natural basting keeps your prime rib from drying out during long cook times.
Smoke flavor penetrates deep into the meat. Wood chunks smolder slowly at low temperatures. You get subtle smoke rings without overpowering the natural beef flavor.
Temperature zones form naturally inside the dome. Hot air rises and circulates in patterns. Your meat cooks evenly from all sides without hot spots that cause burning.
Pro Tip: Season your Green Egg before first use. Burn off any factory residue at high heat for thirty minutes. This step prevents odd flavors in your food.
Many cooks switch from gas grills to ceramic smokers for one reason. They want better results with premium cuts. Prime standing rib roast green egg cooking delivers every single time.
Selecting the Right Cut of Meat
Quality matters more than technique. Start with the best meat you can find. Your effort in the kitchen cannot fix poor quality beef.
Look for Prime grade when possible. This top tier has abundant marbling throughout. The white fat streaks melt during cooking. They baste the meat from inside out.
Choice grade works well too. It costs less than Prime grade. You still get good marbling and flavor. Most grocery stores carry Choice grade regularly.
Ask your butcher for a standing rib roast. This cut includes the rib bones. The bones add flavor during cooking. They also help the roast keep its shape.
Plan for one rib per person. A three rib roast feeds three people well. A seven rib roast feeds a large gathering. Buy more if you want leftovers.
Check the color of the meat. Fresh beef looks bright red. Avoid meat that looks brown or gray. This discoloration means the meat is old.
The fat should look white and firm. Yellow fat means the animal was older. Soft fat means poor storage conditions. Both signs point to lower quality.
Where to Buy Quality Beef
Local butchers often have better cuts than chain stores. They can special order Prime grade for you. Build a relationship with your butcher. They will save the best cuts for regular customers.
Consider online meat suppliers for special occasions. Many ship overnight with dry ice. You get restaurant quality delivered to your door. See our guide on ordering meat online for more details.
Buy your roast two days before cooking. This timing gives the meat time to rest in your fridge. The enzymes break down and tenderize the beef naturally.
Preparation Steps Before Cooking
Preparation starts two days before cooking day. Take the roast out of its package. Pat it dry with paper towels on all sides.
Place the roast on a rack in a pan. Put it in the coldest part of your fridge. Leave it uncovered for twenty four hours. This step dries the surface for better browning.
Season the meat one hour before cooking. Take it out of the fridge and let it warm up. Cold meat cooks unevenly on the grill.
Use coarse salt and black pepper only. Simple seasoning lets the beef shine. Mix two parts salt to one part pepper. Rub this mixture all over the roast.
Add garlic powder if you like. Use it sparingly so it does not burn. Fresh garlic burns fast at high heat. Powdered garlic handles heat better.
Some cooks add rosemary or thyme. Fresh herbs work well tucked under the fat cap. Dried herbs can go in your rub mixture. Both add subtle earthy notes.
Do not use sugar in your rub. Sugar burns at cooking temperatures. It creates bitter flavors on the crust. Save sweet glazes for the last few minutes only.
Score the fat cap in a crosshatch pattern. Cut through the fat but not the meat. This helps render the fat during cooking. It also lets seasoning penetrate deeper.
Pro Tip: Bring meat to room temperature before cooking. This step takes one to two hours. Cold centers lead to uneven doneness throughout the roast.
Prepare your Green Egg while the meat rests. You need steady temperatures before the roast goes on. Rushing this step causes temperature swings later.
The Cooking Process Step by Step
Light your Green Egg two hours before cooking. Use natural lump charcoal only. Briquettes contain fillers that create ash and odd flavors.
Add wood chunks for smoke flavor. Hickory or oak work best for beef. Cherry wood adds a hint of sweetness. Use two or three fist sized chunks total.
Set up for indirect cooking. Place the plate setter or convEGGtor inside. This ceramic plate blocks direct heat. Your meat cooks in circulating hot air instead.
Close the lid and adjust the vents. Open the bottom vent one inch. Open the top vent halfway. Wait for temperatures to stabilize at your target.
Target two hundred fifty degrees for slow cooking. This low temperature renders fat slowly. It also gives you a larger window for perfect doneness.
Place the roast bone side down on the grate. Bones act as a natural rack. They lift the meat above any drippings. This positioning promotes even air flow.
Insert a meat probe thermometer. Place it in the thickest part of the roast. Avoid touching bone or fat with the probe. These areas give false temperature readings.
Close the lid and resist opening it. Every peek releases heat and smoke. Your cooking time extends each time you look. Trust your thermometer instead.
Cook until internal temperature reaches your target. Rare meat finishes at one hundred twenty degrees. Medium rare hits one hundred thirty degrees. Medium reaches one hundred forty degrees.
Plan for carryover cooking during resting. The temperature rises five to ten degrees. Pull the roast early to account for this rise. Your meat continues cooking off the heat.
Total cooking time runs about fifteen minutes per pound. A six pound roast takes roughly ninety minutes. Always use temperature not time as your guide.
| Doneness Level | Pull Temperature | Final Temperature | Color Inside |
|---|---|---|---|
| Rare | 115°F | 120-125°F | Bright red center |
| Medium Rare | 125°F | 130-135°F | Pink center |
| Medium | 135°F | 140-145°F | Light pink center |
| Medium Well | 145°F | 150-155°F | Slight pink center |
Many cooks prefer medium rare for prime rib. This doneness shows off the quality of the meat. Well done prime rib wastes good beef. The high price deserves proper treatment.
Temperature Control Tips
Temperature control makes or breaks your roast. The Green Egg holds heat well once stable. Getting to that stable point requires patience and practice.
Start with a small fire for low temps. Light just a few charcoal pieces. Let them catch before adding more. This method prevents overshooting your target.
Adjust vents in small increments. Wait fifteen minutes after each change. The ceramic takes time to respond. Quick adjustments cause wild temperature swings.
Close vents more to lower temperature. Open vents more to raise temperature. The bottom vent controls airflow into the fire. The top vent controls airflow out of the dome.
Use both vents together for fine tuning. Small changes on both work better than big changes on one. This approach gives you precise control.
Monitor temperature with a good thermometer. Digital probes give instant accurate readings. Analog gauges on the lid can drift over time. Do not trust them completely.
Place a second thermometer on the grate. This reading shows actual cooking temperature. The dome thermometer shows air temperature higher up. Both numbers matter for success.
Wind affects outdoor cooking temperatures. Strong winds pull heat through the vents. You may need to close vents more on windy days. Shield your Green Egg if possible.
Cold weather requires more fuel. Winter cooking uses more charcoal. Plan for longer preheat times. Your target temperature takes longer to reach.
Pro Tip: Keep a spray bottle with water nearby. Use it to tame flare ups quickly. A fine mist cools hot spots without dousing your fire completely.
Practice makes perfect with temperature control. Your first few cooks teach you the most. Take notes on vent settings and cook times. Build your own reference guide.
Resting the Meat Properly
Resting is not optional. This step separates good cooks from great ones. Skipping rest ruins all your careful work. The meat needs time to settle.
Remove the roast from the Green Egg. Place it on a cutting board or platter. Do not cut into it right away. Hot juices will run out and dry the meat.
Loosely tent with aluminum foil. Do not wrap it tight. Tight wrapping steams the crust and makes it soggy. You want to keep heat in without trapping steam.
Rest for at least twenty minutes. Large roasts need thirty minutes or more. The fibers relax and reabsorb the juices. This process happens as the meat cools slightly.
Temperature continues rising during rest. This carryover cooking adds five to ten degrees. Factor this into your pull temperature. Pull early to hit your target.
Use resting time to make sides. Mashed potatoes stay warm while you rest meat. Green vegetables cook fast and finish last. Time everything to be ready together.
Save the drippings in the pan. These juices make excellent gravy. Deglaze with wine or broth for extra flavor. Your guests will love the rich sauce.
Do not refrigerate leftovers immediately. Let them cool to room temperature first. Hot food raises fridge temperature. This affects other stored items.
Some cooks rest meat in a warm oven. Set it to the lowest setting possible. This works for very large roasts. Small roasts rest fine on the counter.
Why Resting Matters
Meat fibers tighten during cooking. Heat squeezes juices toward the center. Cutting immediately releases all those juices. Resting lets fibers relax and redistribute moisture.
Studies show rested meat retains thirty percent more juice. This difference affects every bite. Your effort during cooking deserves this final step. Learn more about meat science here.
Patience pays off with rested meat. The difference shows on the plate. Dry meat looks sad and tastes worse. Juicy meat impresses every guest.
Serving and Carving Techniques
Carving looks impressive when done right. Use a long sharp carving knife. Serrated blades tear the meat. Smooth blades cut clean slices.
Remove the bones before slicing. Cut along the bone line with a sharp knife. The bones pull away in one piece. Save them for making beef stock later.
Slice against the grain for tender bites. Look at the direction of muscle fibers. Cut perpendicular to those lines. Short fibers feel more tender in your mouth.
Cut slices one half inch thick. Thinner slices dry out fast. Thicker slices look rustic and hearty. Adjust based on your crowd preferences.
Serve on warm plates if possible. Cold plates cool the meat fast. Warm plates keep food at proper eating temperature. Run plates under hot water and dry quickly.
Arrange slices slightly overlapping on the platter. This presentation looks professional. Drizzle some jus over the top. Keep extra jus in a gravy boat.
Pair with classic sides for best results. Yorkshire pudding soaks up juices well. Creamed spinach adds color and richness. Roasted potatoes complete the plate.
Offer horseradish sauce on the side. The sharp flavor cuts through rich meat. Many guests expect this traditional condiment. Make it fresh for best taste.
Red wine pairs perfectly with prime rib. Cabernet Sauvignon stands up to bold flavors. Merlot works well too. Serve wine at room temperature for best results.
Pro Tip: Keep bones for stock. Roast them again at high heat. Add vegetables and simmer for hours. You get rich beef stock for soups and sauces.
Leftovers make great sandwiches the next day. Thin slices on crusty bread with horseradish. Add arugula for peppery bite. This meal rivals any deli sandwich.
Common Problems and Solutions
Even experienced cooks face issues sometimes. Knowing what to expect helps you stay calm. Most problems have simple fixes you can apply quickly.
Temperature runs too high. Close both vents more. Add a pan of water inside to absorb heat. Do not open the lid to release heat. This causes bigger swings.
Temperature runs too low. Open vents wider to increase airflow. Add more lit charcoal through the top. Use tongs to arrange existing charcoal. Better airflow raises heat.
Meat cooks too fast. Lower your target temperature next time. Two hundred fifty degrees works better than three hundred. Slow cooking gives more control.
Meat cooks too slow. Check your thermometer accuracy. Your actual temperature may be lower than displayed. Calibrate your probe in ice water to verify.
Crust burns before inside cooks. Your fire is too hot. Lower temperature and cook longer. Move meat away from hot spots. Shield with foil if needed.
Meat comes out dry. You overcooked it or did not rest it. Use a thermometer next time. Rest the meat properly before slicing. Both steps prevent dryness.
No smoke flavor develops. Your wood chunks may be too small. Use larger chunks that smolder longer. Make sure they touch hot charcoal directly.
Smoke tastes bitter and acrid. Your fire may be smothering. Open vents to increase airflow. Clean out old ash before next cook. Fresh air prevents bad smoke.
Green Egg will not hold temperature. Check for cracks in the ceramic. Inspect the gasket around the lid. Replace worn parts to restore performance.
Charcoal will not light properly. Use a chimney starter for reliable ignition. Lighter fluid leaves chemical tastes. Natural starters work without odd flavors.
Additional Resources
The official Big Green Egg website has detailed guides. Visit biggreenegg.com for recipes and tips from experts.
Meat temperature guidelines come from food safety experts. Check foodsafety.gov for current recommendations on safe cooking temperatures.
Keep a cooking journal for each roast. Note temperatures and times and results. You will spot patterns over multiple cooks. Your skills improve with each attempt.
Conclusion
Cooking prime standing rib roast green egg style becomes easy with practice. You now know how to select quality meat. You understand temperature control. You can rest and carve like a pro.
This method produces results that impress guests every time. The Green Egg creates ideal cooking conditions. Low slow heat renders fat perfectly. Smoke adds depth without overpowering.
Start with a small roast for your first attempt. Three ribs feed a family nicely. You learn the process without wasting expensive meat. Confidence grows with each successful cook.
Share your results with friends and family. Host a dinner party to show off your skills. Prime rib brings people together around the table. Good food creates lasting memories.
Your Green Egg deserves regular use. Do not let it sit unused between holidays. Practice with cheaper cuts first. Build skills before cooking for special events.